Every couple of years I find a great basic skirt pattern and I make a bunch. This year's model is a straight skirt with waistline pleats and a doubled bottom band. The pleats bring the fullness smoothly in to the waist. The doubled band adds a bit of weight and body to the bottom of the skirt, accentuates the fullness at the hem and provides an opportunity to play with pattern and mix some prints.

This pattern company doesn't want me to gank their picture from their website, so I photographed it.
Forget for a minute the hot mess on that mannequin and look instead at the sketches. Sometimes with sewing patterns, a sketch really is worth two on a mannequin. In the sketch, we can see a nice pleated skirt with an elastic waist. The sample on the mannequin shows a bunched up mess that a live model wouldn't wear. It isn't until we open the envelope and look at the pattern pieces and directions that we can determine just what is wrong here. Happily, it's an easy fix.
The problem is the waistband. The pattern as written, places the elastic behind the pleats and encloses it with a facing. Sure it's
easy to do it that way, but look what it does to the pleats and the model's hips. A separate, sewn on waistband will fix this.

This skirt isn't fitted so it's really easy to make it bigger. Since my hips are larger than my waist, that is the measurement I'm going to use to adjust this pattern. (If my waist was bigger, I'd use my waist measurement.)
My hip - hip on pattern = total increase. In my case, I need to increase the total by 11". I divide that number by 4 which gives me 2 3/11 to add to the side seam -
we never mess with center front, all adjustments take place at the side seam. 3/11 is close enough to 1/4 to call it good. I'm going to use a 3/8" seam allowance, instead of the 5/8 allowed by the pattern, which will automatically give me an extra 1/4". I only need to add 2" to my pattern piece at the side seam.

Here are my adjusted pattern pieces. Because I've used this pattern more than twice, I've ironed it to freezer paper to make it more durable. Use a cool iron with the steam turned off, and be careful not to let your iron come into contact with the extensions.

After I cut out the pieces, I notched the pleats inward at the top and used tailor's tacks to mark the bottom of the pleats.

I sew all of the pleats from the tailor's tack to the top edge, backstitching at the start and running a couple of stitches off the top edge. One of the advantages to using a straight stitch machine, like my Singer 201-2, is that you can run the stitches past your fabric edge without gumming up the works.

Pleats are all sewn, now I'm going to iron in the crease and sink my stitches by ironing both sides of each seam.

Then I ironed the box pleats flat, matching the fold lines to the stitching tines. Press nice and hard, we want to really set our pleats. Press the front of the pleats too and get those seams as flat as possible. Baste the pleats in place, it only takes a second and it
will make the waistband seam easier and neater.
Sew the side seams, finish the edges (once again I'm using my pinking blade instead of my serger) and press the seams open.

Side seams sewn and pressed on the band. Since these edges are going to be enclosed, they don't need to be finished.

Fold in half and press.

Raw edges together, sew the band to the right side of the skirt. Match side seams and notches.
Stitch and finish the edges.

When sewing a tube on a flat bed, it is almost always easier to control your layers if you sew it from the inside.

It's been said a million times before, because it's true:
Pressing will make or break your garment. Use plenty of pressure when ironing, we want firm creases and flat, fully-opened seams.
First, we iron both sides of the seam to set the stitches. When I first heard about setting the stitches by pressing the seams, I was skeptical. It really does make a difference that can easily be felt by running your fingers along the stitching before and after pressing.

Second, were going to press the seam allowance toward the skirt. Press hard and pull gently at the top of the skirt to make the seam as flat as possible.

This is what it looks like from the right side, after the second pressing step. We can see that the skirt fabric is slightly higher than the band fabric.
The third step is to press the heck out of that and get it flat by holding the top edge of the skirt and pulling it gently while pressing over the seam from band to skirt. Press hard, you will see it smooth right down.

This is our goal: A nice flat seam ready for topstitching.

I like to topstitch with a straight stitch foot. The smaller side of the foot is butted up to the edge of the band, the resulting stitching line will be about 3/16" away from the seam.
Once again I'm stitching from the inside of my tube.

It takes more time to press the band than it does to sew it on, but it's worth the effort. Our goal is for people on the street to say, "Cute skirt" not, "Did you make that?" Learn to love your iron.

Now let's make that waistband.
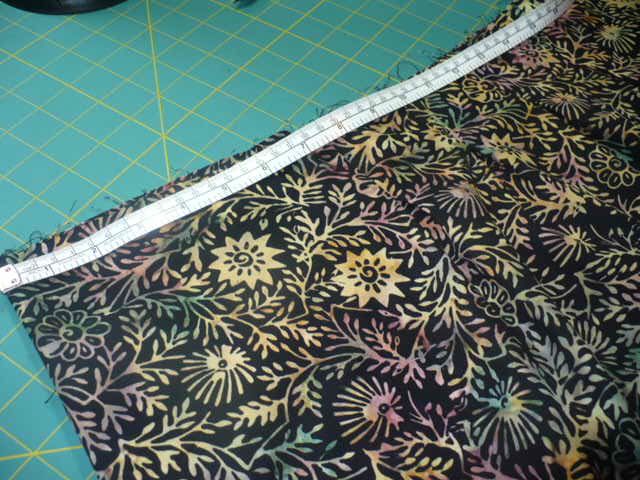
For the length of the waistband, measure the width of the skirt from side seam to side seam at the top edge. Add 1" to allow for 1/2 seams.
To determine the width or your waist band, double the width of your elastic and add 1" to allow for a scant 1/2" seam at the top of the skirt.
Cut (2) following the above directions, sew side seams, press and fold in half lengthwise.

I like to use wide elastic, 1 1/2", so I cut my waistband 4" wide. Here it is seamed and pressed. I'm going to attach the waistband and stuff the elastic in at the same time so I've also already joined the ends of the elastic.

Matching raw edges, we're going to sew the waistband to the right side of the skirt.

I've got my elastic inside the waistband. Using a zipper foot I'm going to stitch close to the elastic being careful not to catch it in the stitching. It takes a lot of stopping to stuff in the elastic, and pull it through the waistband from the back as we go. I'd rather fuss with all of that then thread elastic through a casing with a bodkin.
I attempted to film this, but my videographer did it sideways. It's at the very bottom of this post if anyone would like to watch it. It might be a good idea to take a Dramamine first.

Waistband is attached, seam allowance is finished.

Lightly press the seam allowance toward the skirt. This time we don't need to use a lot of pressure, just a lot of steam to coax that fabric into position.
At this point, the skirt is finished.

But, there's trim in my stash, I may as well use it. I topstitched it along the seamline overlapping the ends at the side seam. Then I pivoted my needle and stitched downward through the trim right on the side seam, backward and forward two or three times to ensure that the braid doesn't unravel. I cut very close to the stitching and then doused the end thoroughly with Fray Check. The join is pretty hard to detect.

It's raining today, so here I am in the study. My photographer is cracking me up, but the skirt looks pretty darned good.

One last thing in the interest of fairness. I would never leave my house with my shirt tucked into my elastic waistband, but see how much better the top of this skirt looks than the sample worn by that poor mannequin?
This has been a really long post because if one were to follow the directions that came with this pattern the result would be an inferior garment. The pattern is perfectly good, why ruin it with quick and dirty construction techniques? That would be simpering idiocy.
 Recently I found this pattern in the Vogue catalog. It's a simple jacket with dolman sleeves and waist darts for fit and shape. It's also part of the "Today's Fit" line that features extended sizes. I wasn't exactly sure what Vogue meant by "Today's Fit". I hoped it meant that if I cut the size indicated by the measurements on the back of the envelope, I
 I didn't have to cut out the largest size, or increase at the waist. The upper bust wasn't as sloppy loose as most other patterns would have been if I'd cut according to my pattern size. Unfortunately, the upper sleeves are so tight that it's impossible to wear the finished coat over a long sleeved t-shirt. I would've never guessed from the pictures above that the dolman sleeve would be so disproportionately small.
 This is how far I can raise my arm. I really don't think cutting out an extra 1" for insurance will help this issue. A pivot and slide to raise the shoulder and the underarm sleeve will.
 The last problem I had was completely of my own making. I have a habit of taking a pattern piece and placing it on my body to get an idea of whether it's going to be close to fitting properly or if it's going to need a lot of tweaking. So I took the front pattern piece and draped it over my front and was amazed to find that the waist on the pattern was where my own waist was. I thought I'd gotten lucky and "Today's Fit" maybe meant, "Patterns for Short Waisted Fat Girls". Instead of moving the waistline darts I went ahead and shortened the pattern at the bottom.